

I’ve brewed hundreds of cups with the AeroPress—on café bars, in hotel rooms, at campsites—and I’ve seen the same errors quietly sabotage flavor. In this guide, I’ll break down the most Common AeroPress mistakes to avoid, show you why they happen, and share practical fixes you can use today. If you’ve ever wondered why your cup swings from sour to bitter or feels flat, you’re in the right place. Let’s dial in your technique so you can get consistently great coffee with the AeroPress.

Source: www.youtube.com
The Big Three: Grind Size, Brew Ratio, And Water Temperature
These three variables determine 80% of your AeroPress results. When they’re off, everything else struggles to compensate.
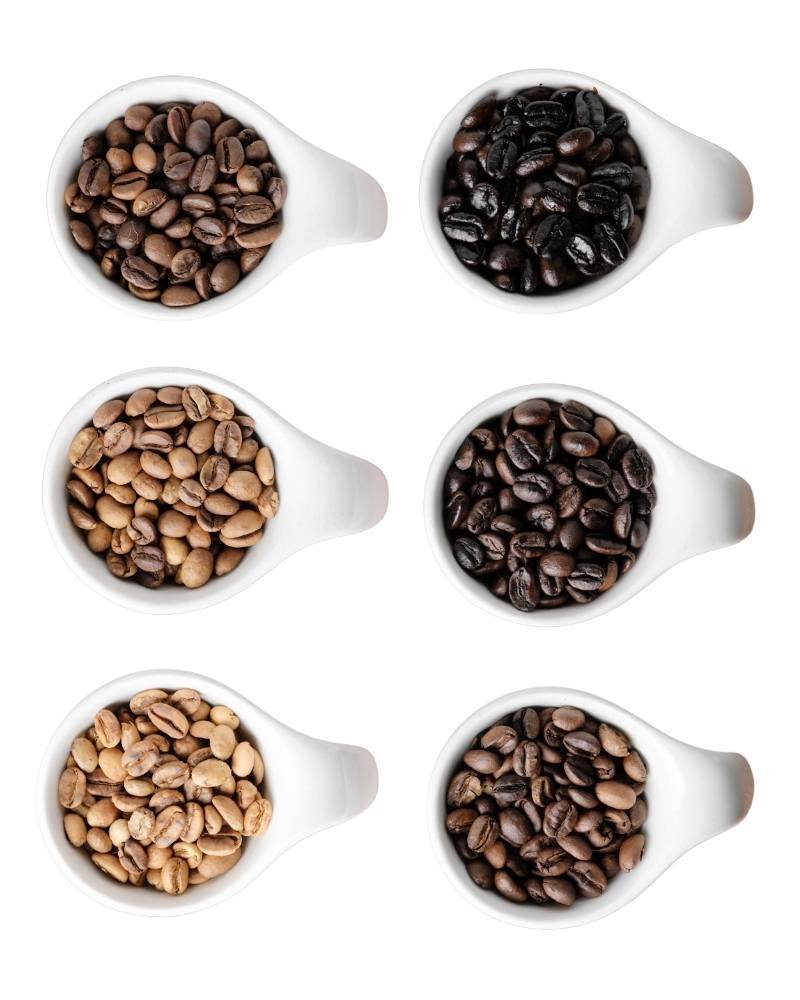
- Grind size: Too fine extracts harsh bitterness and silty cups; too coarse tastes sour and thin. For most recipes, aim for a medium-fine grind, roughly like table salt. If your cup tastes sour, go a notch finer; if it’s bitter/astringent, go a notch coarser. Burr grinders deliver far more consistency than blade grinders.
- Brew ratio: A common starting point is 1:15–1:17 coffee to water by weight. For example, 15 g coffee to 225–255 g water. If you dislike weighing every time, pre-dose coffee into small jars or bags.
- Water temperature: Specialty coffee standards generally target 195–205°F (90–96°C). With lighter roasts, I often prefer 203–205°F to unlock sweetness; with darker roasts, 190–195°F can reduce bitterness. If you don’t own a thermometer, bring water to a boil and let it rest 30–45 seconds before pouring.
Personal note: When I train new baristas, we calibrate these three first. Only after the cup is clean and balanced do we tweak agitation and contact time for nuance.
Source: batchcoffee.co.uk
Water Quality And Freshness: The Hidden Flavor Makers
Even perfect technique can’t fix poor water. Coffee is roughly 98% water, and the AeroPress is transparent enough to expose water flaws.
- Use clean, low-odor water with moderate mineral content. Extremely soft or distilled water yields flat cups; very hard water mutes acidity and clarity.
- Target total hardness in the neighborhood of 50–150 ppm and alkalinity around 40–70 ppm for balance. If your tap water is inconsistent, try a reputable mineral packet or a filtration pitcher designed for coffee.
- Use fresh coffee, ideally 5–21 days off roast for most roasts. If your bag hisses a lot when opening fresh, let grounds bloom long enough to degas.
I once brewed the same AeroPress recipe with excellent café water and then with unfiltered tap water at a client’s office. The difference was night and day—aroma collapsed and acidity disappeared with the tap water.

Source: www.youtube.com
Skipping Or Rushing The Bloom
One of the most common AeroPress mistakes is ignoring the bloom. Freshly roasted coffee releases CO2 that repels water and blocks extraction if you pour all at once.
- Add 2–3 times the coffee weight in hot water first, stir gently, and wait 20–30 seconds before filling. Example: For 15 g coffee, bloom with 30–45 g water.
- If the bloom balloons aggressively, extend to 30–40 seconds, then proceed.
- For older coffee with little gas, a shorter bloom is fine.
When I skipped the bloom during a busy rush to “save time,” I consistently got under-extracted, sharp cups. A brief bloom fixed it without slowing service.
Source: www.foodie.com
Over-Agitation Or No Agitation
Stirring affects extraction speed and clarity in the AeroPress. Overdo it and you pull fines into the cup; neglect it and you get channeling and sourness.
- Gentle is best: 5–10 small stirs at bloom, then 2–5 stirs before plunging is plenty for most recipes.
- Swirl vs. stir: A light swirl can distribute grounds with less disturbance than a vigorous stir, improving clarity.
- Watch your filter: More agitation drives more fines through metal filters; paper filters handle agitation better.
I tested side-by-side cups with identical recipes, one with 20 aggressive stirs, one with 7 gentle stirs. The aggressive cup tasted muddier and more bitter with a sandy finish.
Paper Vs. Metal Filter Mistakes
Filter choice changes body, clarity, and the margin for error.
- Paper filter: Cleaner, brighter cups with less sediment. Rinse the paper to remove papery taste and preheat the cap. Use a slightly finer grind than with metal.
- Metal filter: Fuller body, more oils, but easier to over-extract and push fines. Use a touch coarser grind and lighter agitation for clarity.
- Double-filtering: For a sparkling cup, stack two rinsed papers. It slows flow a bit and boosts clarity.
Avoid the mistake of not rinsing your paper or not adjusting grind when switching filter types.
Brew Time And Plunge Pressure
Time and pressure are your gas and brakes. The AeroPress is forgiving, but not unlimited.
- Total time: A classic approach is 1:30–2:30 minutes total with standard orientation. Inverted recipes can run 2:00–3:00 including steep.
- Plunge speed: 20–30 seconds of steady, gentle pressure is ideal. If you’re straining, your grind is too fine or your dose is too high. If it plunges instantly, grind is too coarse.
- Stop at the hiss: Once you hear air, stop. Forcing the last drops can squeeze harsh compounds.
Data point: Across controlled tastings, extending the plunge past the hiss reliably increased astringency. Keeping a calm, even press improved sweetness perception.
Inverted Method Pitfalls And Safety
The inverted method gives longer contact time and control, but it introduces risks.
- Spills and slips: Use a stable surface and keep one hand on the chamber. Flip carefully, using the cap as a lid, then seat it firmly before turning upright.
- Seal issues: If the plunger is worn or wet with oil, you can lose pressure. Wipe the seal dry before assembling inverted brews.
- Over-steeping: Because grounds stay immersed, it’s easy to overshoot. Set a timer and plunge promptly.
I love inverted for lighter roasts, but I’ve seen more accidents from rushed flips than any other AeroPress mistake. Slow is smooth, smooth is fast.
Cleaning, Maintenance, And Plastic Taste
The AeroPress is low-maintenance, but neglect shows up in the cup.
- Rinse immediately after brewing; coffee oils go rancid quickly.
- Once a week, soak parts in warm water with a mild, coffee-safe cleaner. Avoid harsh detergents that leave residue.
- Replace the rubber plunger seal when it feels loose or looks cracked. A tired seal causes slipping, bypass, and messy brews.
- Store dry and disassembled to prevent odors.
If you’ve ever noticed a faint plasticky note, a thorough soak and a few rinsed paper-filter brews usually reset the flavor.
Repeatability: Weighing, Logging, And Iterating
A big mistake is changing multiple variables at once, making it impossible to learn.
- Weigh both coffee and water. A simple pocket scale pays for itself in better cups.
- Change one variable at a time, taste, and take notes.
- Log roast date, grind setting, water temp, time, filter, and your flavor score.
- Build a personal baseline recipe for each bean style: light, medium, dark.
My logbook is my unfair advantage. After a few entries, patterns jump out and dialing in a new bag becomes easy.
Troubleshooting: What Your Cup Is Telling You
Use your palate as a diagnostic tool.
- Sour, sharp, thin: Grind finer, increase water temp, extend contact time slightly, or stir a bit more.
- Bitter, drying, harsh: Grind coarser, reduce water temp, agitate less, stop plunging at the hiss.
- Muddy, silty: Use paper filter or coarsen grind and reduce agitation; consider double paper.
- Flat, dull: Improve water quality, raise temp, ensure fresh beans, lighten agitation and shorten brew to restore brightness.
Treat this like a flowchart: adjust one lever, taste again, repeat.
Frequently Asked Questions Of Common AeroPress Mistakes To Avoid
What’s the best grind size for AeroPress?
A medium-fine grind is a reliable starting point, roughly like table salt. Adjust finer for sourness and coarser for bitterness or excessive resistance when plunging.
Is boiling water too hot for AeroPress?
Boiling water can over-extract, especially with darker roasts. Aim for 195–205°F. If you lack a thermometer, let boiling water rest 30–45 seconds before pouring.
Should I use the inverted method or the standard method?
Both can produce great coffee. Standard is simpler and safer; inverted provides longer steep control and heavier body. Choose based on preference and comfort with flipping safely.
Why does my AeroPress coffee taste muddy?
Likely causes are over-agitation, very fine grind, or using a metal filter without adjusting grind. Try a paper filter, coarsen the grind slightly, and stir more gently.
How important is the bloom step?
Very. Blooming releases CO2 and prevents under-extraction. Bloom with 2–3 times the coffee weight in water for 20–30 seconds, then continue your pour.
Do I need to rinse the paper filter?
Yes. Rinsing removes papery flavors and preheats the cap, improving clarity and taste.
Why is plunging so hard?
Your grind is probably too fine or your dose is too high. Coarsen slightly, reduce dose, or plunge more gently over 20–30 seconds.
Conclusion
Small changes make big differences with the AeroPress. Nail the fundamentals—grind size, brew ratio, and water temperature—then fine-tune bloom, agitation, filter choice, and timing. Keep your gear clean, your notes consistent, and your adjustments deliberate. If you apply the tips here on your next few brews, you’ll brew with more confidence and enjoy sweeter, clearer, more consistent cups.
Ready to level up? Try one adjustment from this guide today, log your results, and share your experience. Subscribe for more hands-on brewing guides, or drop a comment with your favorite AeroPress recipe—we learn faster together.
Watch This Video on Common AeroPress mistakes to avoid